


COPYRIGHT © 2016-2026. The Owl Teacher | Privacy page | Disclosure Page | Shipping | Returns/Refunds
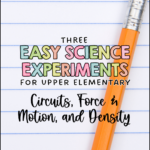
Looking for easy science experiments your upper elementary students can do in a single class period? These three hands-on science experiments cover some of the biggest physical science topics in grades 3–5: a simple circuit activity to explore electric current, a force and motion experiment with Hot Wheels cars and ramps, and an exploration of density and solubility using a “magic” dry-erase marker trick.
Each experiment uses materials you probably already have (or can grab cheaply), takes less than 45 minutes, and gives your students something to actually DO instead of just read about. Here’s how to set up each one.

Science Standards These Easy Science Experiments Cover
NGSS (Next Generation Science Standards):
- 4-PS3-2 — Make observations to provide evidence that energy can be transferred from place to place by sound, light, heat, and electric currents. (Experiment #1 — Simple Circuit Lab)
- 4-PS3-4 — Apply scientific ideas to design, test, and refine a device that converts energy from one form to another. (Experiment #1 — Simple Circuit Lab)
- 3-PS2-1 — Plan and conduct an investigation to provide evidence of the effects of balanced and unbalanced forces on the motion of an object. (Experiment #2 — Force and Motion with Hot Wheels)
- 3-PS2-2 — Make observations and/or measurements of an object’s motion to provide evidence that a pattern can be used to predict future motion. (Experiment #2 — Force and Motion with Hot Wheels)
- 5-PS1-3 — Make observations and measurements to identify materials based on their properties. (Experiment #3 — Density and Solubility with Dry-Erase Markers)
- 5-PS1-4 — Conduct an investigation to determine whether the mixing of two or more substances results in new substances. (Experiment #3 — Density and Solubility)
Texas TEKS (updated 2024–25):
- TEKS 4.9A — Demonstrate that electricity travels in a closed path, creating an electrical circuit, and explore an electromagnetic field. (Experiment #1)
- TEKS 4.9B — Differentiate between conductors and insulators. (Experiment #1 — extension activity)
- TEKS 4.9D — Design an experiment to test the effect of force on an object such as a push or a pull, gravity, friction, or magnetism. (Experiment #2)
- TEKS 3.8A — Categorize matter by its physical properties, including shape, relative mass, relative temperature, texture, flexibility, and whether material is a solid or liquid. (Experiment #3)
- TEKS 5.8A — Compare and contrast the properties of substances before and after they are combined. (Experiment #3)
Experiment 1 – Build a Simple Circuit Lab (Current Electricity)
Teach your students about current electricity. After introducing terms and reading about current electricity in the electricity unit, share an experiment to bring the concepts to life.
With current electricity, electric current flows along a path. This simple circuit activity works because electrons flow through a closed loop. When the loop is broken, the flow stops. One of the coolest ways to show this current electricity is through a simple experiment in which students build their own circuit lab. All it takes is size D batteries, battery holders with clips, insulated wire, flashlight bulbs, and bulb holders. With these easy science experiments, your students can create a closed circuit and understand the concept of a closed loop.

- First, begin by providing the materials to your students.
- Then, challenge your students to figure out how to make the bulb light.
- Next, have your students disconnect the wire from the end of the battery to see what happens.
- Reflect on the different terms introduced at the beginning of the lesson with questions from the Building a Simple Circuit Lab reflection sheet.

- What are the terminals?
- What is the energy source?
- What happens when you connect the plastic covering of the wire and not the exposed plastic ends?
- What two parts are needed to make electricity flow?
- Do you need a resistor?
- Do you have to have wires connected to both terminals to complete the circuit?
These reflection questions, along with additional reading, will help your students understand current electricity with this engaging, but easy science experiment. You can read about other great electricity experiments here.
Once students build a simple circuit, challenge them to test which materials conduct electricity. Hand them a paper clip, a rubber eraser, a penny, a pencil, and a piece of string. Have them predict which items will complete the circuit and which won’t — then test.
Materials Needed:
- size D batteries
- battery holders with clips
- insulated copper wire (cut into 6–8 inch strips)
- flashlight bulbs, bulb holders.
- Optional:
- additional bulbs for series vs. parallel circuit extension
- items to test as conductors/insulators (paper clips, rubber bands, pencils, coins, erasers).
Experiment #1: Estimated time: 30–40 minutes (including reflection questions)
This simple circuit activity pairs perfectly with my full electricity unit, which covers static electricity, series and parallel circuits, open and closed circuits, conductors and insulators, electromagnetism, and other hands-on science experiments.
Want to go deeper with electricity? Check out my full post on 6 electrifyingly easy ways to teach electricity — including fruit batteries, light-up vests, and the famous glowing pickle demonstration.
My complete Electricity Lesson Plan Unit includes 15 detailed lesson plans covering static electricity, current electricity, series and parallel circuits, conductors and insulators, and electromagnetism.
Experiment 2 – The “Magic” Dry-Erase Marker (Density and Solubility)
Maybe you’ve seen the online video on how to bring marker drawings to life with water! It’s not just magic; there’s actually science behind the “magic” marker! Dry-erase markers contain a release agent that prevents the ink from bonding to smooth surfaces. When you add water, the ink lifts because it’s less dense than water and insoluble — it won’t dissolve. Permanent markers don’t have that release agent, which is why they bond to surfaces and don’t lift.

- First, have your students write with a dry-erase marker on a smooth, non-porous surface, such as a glass dish or a desk.
- Then they should pour water over the marker drawing.
- Next, the marker magically “lifts” away.
- After performing the initial experiment, try using different types of markers to repeat the experiment on smooth, non-porous surfaces. (Use dishes or surfaces that can be marked with permanent markers.)
- Next, use dry-erase markers on different porous surfaces, such as paper or corkboard.
- Finally, have your students reflect on simple questions to figure out why the marker lifts away.
- What are the qualities of dry-erase markers compared to permanent markers?
- Why does the dry-erase marker lift from porous surfaces and not non-porous surfaces?
- Why does the dry-erase marker lift and not the permanent marker?
- Discuss the difference between soluble (dissolvable) and insoluble (incapable of being dissolved) substances.
- Discuss density and how it is related to solubility.
After the density experiment, ask students: Why does the dry-erase marker lift, but the permanent marker doesn’t? What does this tell us about how substances interact with surfaces? What’s the difference between soluble and insoluble? This fun lesson is a great way to discuss density and solubility with your students. It also connects well with states of matter or the properties of matter.
Materials Needed:
- dry-erase markers (multiple colors work best)
- smooth non-porous surfaces (glass dishes, ceramic plates, or laminated paper)
- permanent markers (for comparison)
- water in a small squeeze bottle or dropper
- paper towels
- Optional:
- porous surfaces for testing (paper, corkboard, fabric scraps)
Experiment #2: Estimated time: 20–30 minutes (quick setup, great for a short block)
Experiment 3 – Hot Wheels Force and Motion Experiment
Even upper elementary kids love Hot Wheels cars! Teach your students about force and motion with some books, cars, and pennies! Have students record the number of books (ramp height), distance traveled, time, and calculated speed in a simple table. This is a great opportunity to integrate math — students can calculate speed by dividing distance by time.

- Start by introducing concepts of force and motion with your students with the force and motion unit materials.
- Next, have your students make a ramp with a book and a small board.
- Then, have them roll the Hot Wheels car down the ramp.
- Next, measure the distance traveled, time, and speed (distance/time) on the force and motion chart.
- Repeat the experiment with three and five books.
- Have your students reflect on the questions:
- How does height impact the speed of the car?
- How does the angle impact the motion of the car?
- What role does gravity play in the experiment?
- Your students can also add an additional challenge by taping pennies to the top of the car.
- Ask your students how weight impacts the experiment.
After the initial experiment, challenge students to change one variable: What happens if you add pennies to the car (more mass)? What happens if you change the surface the car rolls on (carpet vs. tile vs. smooth desk)? What happens if you use a longer ramp?
Materials Needed:
- Hot Wheels cars (1 per group)
- hardcover books (varying sizes)
- a small board, ramp, or ruler to create an inclined plane
- measuring tape or meter stick
- stopwatch or timer
- pennies or small weights (to add mass to the car)
- recording sheet for data collection.
Experiment #3: Estimated time: 35–45 minutes (including data collection and discussion)
This experiment naturally leads into a discussion about friction, gravity, and how engineers design real cars and roads.
You can read about other force and motion experiments here and grab a freebie!
If your students love the ramp experiment, simple machines are a natural next step. Here are 5 simple machines projects that use the same inquiry-based approach — including levers, pulleys, inclined planes, wheels and axles, and wedges.
For more on making simple machines hands-on and engaging, check out Making Simple Machines Simple (and Fun!) — it covers all six simple machines with real-world connections.
Which of the Easy Science Experiments Should You Do First?
That depends on what you’re teaching right now:
- If you’re in an electricity unit, start with the Simple Circuit Lab. It gives students hands-on experience with current electricity before they move into more complex circuits.
- If you’re teaching force and motion, the Hot Wheels experiment is your best entry point. It’s visual, it’s measurable, and every kid in your room already knows what a Hot Wheels car is.
- If you need a quick activity for matter or properties of substances, the dry-erase marker experiment is fast, requires almost no setup, and leads to great discussions about density and solubility.
- If you have one science block to fill and want maximum engagement, go with the Hot Wheels. It’s the one students will remember longest.
These incredible yet easy science experiments can be completed at home or school. Pair these and other experiments with science unit lesson plans to support student learning!
Looking for more easy science experiments beyond physical science? Try these 10 hands-on plant activities or these 10 ecosystem project ideas for your life science units.