


COPYRIGHT © 2016-2026. The Owl Teacher | Privacy page | Disclosure Page | Shipping | Returns/Refunds
Scaffolding is one of the most important strategies you can employ in your upper elementary classroom, especially when it comes to math. Your students are a set of diverse learners, each unique—standardized lessons won’t always unlock every student’s potential!
In 2024, differentiation is a well-known term in the teaching sphere, and for good reason: differentiation allows you to cover the same material with your entire classroom while simultaneously tailoring to individual students’ needs. Everyone learns, and everyone wins!
Of course, you know from experience in your own classroom that differentiation may not always be as easy as that. Coming up with different strategies for different students can sometimes take as long as coming up with the lesson plan in the first place!
That’s where scaffolding comes in. Scaffolding is a strong intervention strategy that has tons of merit in just about every situation, including tricky lessons such as area and perimeter. Sure, you can (and should!) tier your lessons as well as implement other differentiation strategies, but scaffolding especially can make a huge difference.
Luckily, there are a variety of ways you can scaffold area and perimeter lessons beyond simply using the same tactics over and over. Before we dive into those methods, however, let’s take a quick refresher course on scaffolding just to make sure we’re all on the same page! Things tend to have changed since I was in school all those years ago… 😉
Scaffolding Defined
Scaffolding in upper elementary math classrooms revolves around providing structured, responsive support to help students build a strong foundation in mathematics. The key word here is responsive–to scaffold effectively, you must respond to a specific student’s needs and learning style. Ultimately, the goal of scaffolding is to foster independence and create confident mathematical masters. No students needs to be left behind!
To get more technical, scaffolding refers to a teaching method where you provide successive levels of temporary support that help students reach higher levels of both comprehension and skill acquisition. I like to compare scaffolding to providing students with a ladder. You give them the means to climb, but they still have to pull themselves up each rung of the ladder–you can’t carry them, or they’ll never learn to climb! That’s why it’s so important to ensure you’re scaffolding rather than rescuing students.
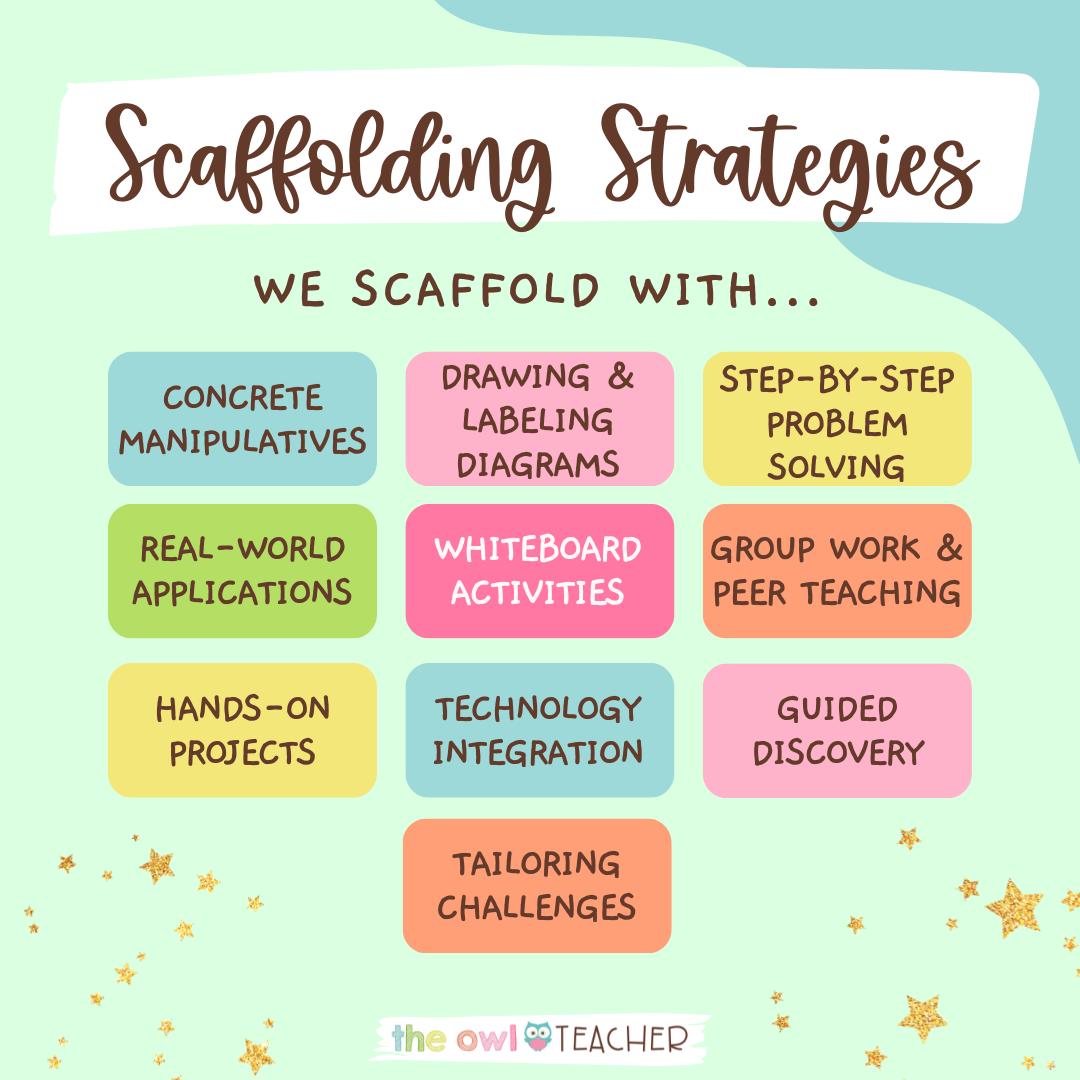
The art of scaffolding comes with several key elements: prior knowledge activation, step-by-step learning, tailored instruction, use of visuals and tools, interactive learning, feedback and assessments, fading support, and encouraging higher-order thinking. It’s no short list, and it may seem overwhelming, but as the amazing teacher you are, I’m willing to bet that you already employ most, if not all of these concepts in your classroom.
Why Do We Scaffold in Upper Elementary Math?
I’ve touched on it here and there by now, but scaffolding in upper elementary math is all kinds of important! So important, in fact, that I want to go a step further and discuss why. Of course, you’re welcome to skip ahead to the juicy bits, but I think you should stick around… But I may be biased 😉
You can’t tell, but I’m cracking my knuckles right now. First up, scaffolding in math is vital for learner diversity! You have tons of different learners in your classrooms: visual learners, auditory learners, kinesthetic learners, and even more. Beyond that, it’s a plain fact that students simply learn at different rates. By scaffolding, you’re supporting students who need a little boost!
In addition, struggling learners benefit from establishing clear leaning objectives, especially by using the SMART method: define Specific, Measurable, Achievable, Relevant, and Time-bound objects for lessons. Bringing in these extra differentiation strategies helps nip problems in the bud, preventing the amount of catch-up you may have to do later on down the road.
However, scaffolding is also a great tool to build conceptual understanding, critical thinking, and problem-solving skills. Offering a “ladder” by scaffolding with students teaches each of these concepts one at a time, where students can “pull themselves up” by conquering each piece.
I’ll be honest: there are DOZENS of benefits to scaffolding, but… I’m really excited to get to the strategies, so let’s take a look!
Methods for Scaffolding Success with Area and Perimeter
I’ve gone over plenty of scaffolding strategies in the past, but those were more of a general overview that could be applied to a variety of lessons in your upper elementary classroom. For now, I want to get a little more personal with scaffolding methods that can be used specifically with area and perimeter!
Concrete Manipulatives
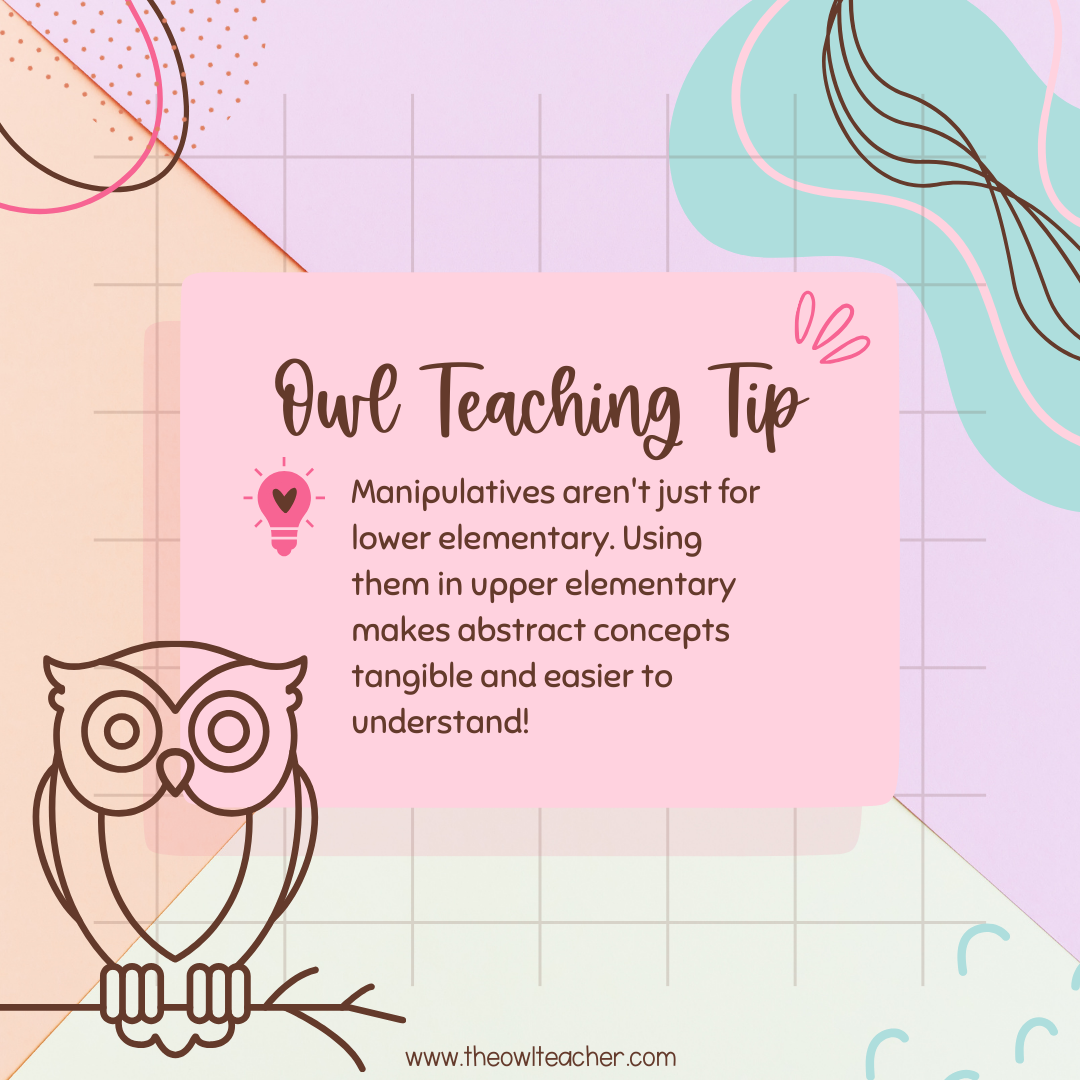
Area and perimeter is an excellent math concept for manipulatives! Use tiles, graph paper, or building blocks to help students physically construct and visualize are and perimeter. For example, students can build shapes with blocks (or tiles) and measure both the sides of the blocks as well as the interior space. What relationship can they find between the area and perimeter of both the individual blocks and the bigger construct?
Another concrete “manipulative” is candy boxes. I know, I know, do your kiddos really need the sugar? Keep in mind, however, that pulling out boxes of candy is an excellent way to captivate their attention from the start! You can check out my post on area and perimeter candy boxes here and grab a freebie, too!
Draw and Label Diagrams
When in doubt, draw it out! Encourage students to draw a variety of rectangles and label the sides and areas. These visual representations aid in their understanding of how length measurements relate to perimeter and how interior space relates to area.
A fun activity that encourages students to draw and label shapes is creating cities! Students should be given a grid (or a sheet of graph paper) and instructed to create unique cities using buildings of varying shapes and sizes. You can set requirements, such as no two buildings may be the same size, or the total area of buildings must be between these numbers. Have fun with it!
Step-by-Step Problem Solving
This one may seem like a no-brainer, but the step-by-step problem solving process is a vital part of scaffolding. Go back to the basics and take the process one step at a time! Break down the concept of calculating area and perimeter into clear, manageable steps. Begin by defining perimeter and then adding all the sides together before moving onto finding hidden sides and area calculation.
Introduce formulas when kiddos are ready. Sometimes formulas can be intimidating, especially when letters are involved!
Real-World Applications
Real-world applications are always a hit! Answer the question “When are we ever going to use this?” before it’s even asked, and prove to your kiddos that math is useful in everyday life.
For area and perimeter, it’s super easy to relate to real-life scenarios. The possibilities are endless: determine the amount of paint needed for a room or how much fencing you need to fence off your garden.
Interactive Whiteboard Activities
If you’re ready to take on technology, consider utilizing digital tools for drawing shapes and visually demonstrating how changing dimensions affect area and perimeter. Have students hypothesize what they think will happen when you shrink or enlarge one side of the rectangle! Will the area increase or decrease? How do they know?
Even if you’re not ready to tackle technology with digital whiteboards, no worries. You can simply model with examples on the board, drawing differently-sized rectangles and explaining each step in the calculation process as you go. Then, have students replicate similar problems on their own or as a group.
Group Work and Peer Teaching
Peer teaching is such a reliable tool, and it’s great for teaching area and perimeter! Assign group activities where students can measure classroom objects or spaces and calculate their area and perimeter, working together to teach and learn from one another.
Besides, sending kiddos out for group work is an excellent time for you to meet one-on-one with students who may need a little bit of intervention. You don’t ever want to make anyone feel singled out, after all!
Hands-On Projects
You knew it was coming, right? I’m all over hands-on learning!
For area and perimeter, there are a plethora of hands-on activities and projects all over the world wide web for your perusal. For instance, my design-a-house area and perimeter PBL activity is an excellent hands-on resource that provides all the materials—students just cut out furniture blocks and paste ’em onto the grid! Then, they can find the area and perimeter while simultaneously designing their dream home. For an in-depth use of this resource, take a look at this blog post!
The neat part about hands-on projects is that they often relate to real-world situations where tricky math concepts can be applied. It’s a win all around!
Technology Integration
Listen, technology can be intimidating, but there’s no question that it’s running the future. At this point, your upper elementary kiddos have grown up with technology all around them, so it’s only natural that you integrate it into your math lessons!
For area and perimeter, you can use educational apps or software that allow students to experiment with changing the dimensions of shapes and observe how it affects area and perimeter. Alternatively, take a look at the variety of digital area and perimeter resources on TpT and elsewhere—not to brag, but my aforementioned PBL activity does come in digital! 😉
Guided Discovery
The pride a student feels upon making a discovery on their own is unparalleled. When scaffolding, take care to pose guided questions that lead students to discovering properties on their own! Ask questions that they can physically work through, such as “How does doubling one dimension of a rectangle affect its area and perimeter?”
Remember, your goal is to provide the ladder and support them as they climb each rung, not to carry them!
Tailor Challenges to Different Levels
Yep. In an article about differentiation, I’m telling you to differentiate. We can all use a friendly reminder from time to time, right?
Obviously, scaffolding involves providing students with challenges appropriate to their level, such as spending more time on the basics for lower-level math students. However, it’s important to differentiate in the other direction, too—for more advanced students, for instance, you can introduce irregular shapes or multi-step problems. Of course, students who need more support should focus on regular shapes and be provided with formula sheets.
Ultimately, it’s YOUR classroom, and you know your students better than anyone else. You know what resources work with them, what challenges they face daily, and how confident they feel when it comes to learning new math concepts. By scaffolding with area and perimeter, you can help your upper elementary math students conquer those challenges and light up the classroom with bright new knowledge!
Tailoring lessons to fit all learning styles means every single students gets a fair shot at understanding and enjoying math. It’s not just about numbers; it’s about sparking curiosity and confidence in young kiddos to create lifelong learners! Making math fun and accessible is the key to helping students grow and succeed.
For more differentiated area and perimeter resources, check out the section on my TpT store. Differentiation in your math classroom is EXTRA easy when someone’s already done the tailoring for you!
Thank you for reading, friends, and don’t forget to sign up for my email list while you’re here. I look forward to chatting at you soon!
