Not too long ago I discussed the difference between scaffolding and rescuing. I mentioned my struggles and how I was rescuing my students without even knowing it and how I didn’t have a clue what scaffolding was, let alone scaffolding strategies! I was on a mission to determine what it meant and how to implement it in my classroom. What did I find? Not only did I discover that I was generally doing it in some cases, but it was easy to do in others!
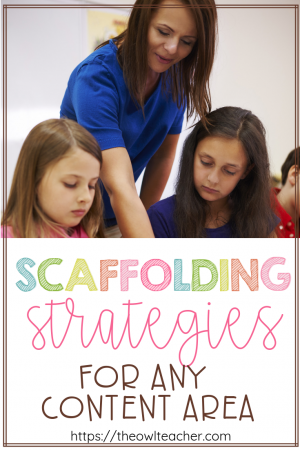
As I mentioned before, scaffolding is about bridging readiness and mastery so we can increase the potential for student success. Students need teachers to help provide them with just enough support to help them master their learning goals. If you are doing it for them or, in my case, doing all the talking and exerting the most energy, you are rescuing.
If you aren’t sure how to scaffold your students’ instruction, let me be of some help! I have a few strategies that are effective for any content area below.
Effective Scaffolding Strategies
1.) Use Graphic Organizers. When teachers use graphic organizers as one of many scaffolding strategies, they are helping students make their thinking concrete. This is like creating training wheels for students. Graphic organizers, charts, and even pictures are perfect as scaffolding tools.
2.) Answer and Repeat. This is one of my favorite scaffolding strategies, because it is a great way to check for understanding. When reading a difficult text or learning a new concept, call on a strong student to answer a question. Then, call on another student to repeat, in his or her own words, what was just said. If the student seems stuck, then let them “phone a friend.”
3.) Slow Down. No, really. We move so fast as teachers because we fear the “we won’t get through it all.” But, when we slow down and give students more time to process, we are really helping students. It is an effective scaffolding strategy when we pause at various points of instruction and break it up. Think about it. If something is above your head, it’s immediately overwhelming, but if you break it into manageable chunks and take your time through it, you’re able to process it much better!
4.) Model EVERYTHING with Think Alouds. I love think alouds. I learned a long time ago that you should never assume that you don’t need to model even the simplest things, like writing your name on the paper during the first day of school. You’ll be amazed sometimes. When you model for students and think aloud how you worked through a process to figure something out, it helps them see things in a much different light. (And they think, “Wow, she’s just like us!”) Use the “I” statements. For example, “I was confused at first, but then I remembered that if I just keep reading, I may be able to figure out the word from the other words in the sentence…”
5.) K.I.S.S. Keep it Simple, Sweetie! When you first start out, make it simple. When I first start teaching fractions, I don’t immediately jump right into the hard stuff. I review the basics. I use manipulatives. It’s very similar to my post, Teaching Math So Students Get It. When reading, I echo read, and then I choral read. It’s all about the gradual release of responsibility. You want to slowly move into the more complex versions. If you move too fast, you’ll scare off the animals. 🙂
6.) Provide an Example. It’s always best, when you are completing a project or an assignment, that students are given an example of what high quality work looks like. This can help them see what is expected of them. While a rubric is nice, actually seeing a concrete model is a scaffolding strategy that really helps students.
7.) Pre-Teach Vocabulary. You may already know this, but when you are trying to read about a new concept, there is definitely going to be vocabulary that is not familiar to students. Instead of glazing over it (and letting students get hung up on it), tell them ahead of time of their meanings. I always read the passage(s) ahead of time and select any words that are critical to the understanding of the passage. Use the Frayer model by having students give you examples, non-examples, the definition in their own words, and a picture of the word. If it’s something that is a large word, but it doesn’t matter as much AND they can still understand the passage without it, then I don’t pre-teach it.
8.) Use Cue Cards or Question Stems. These are very popular but very effective. Provide students with questions that they can ask themselves as they read or things to remind themselves of what to look for. For instance, “What is the main idea of this section? What details support that?”
9.) Annotate. This is not just a close reading strategy. Students can use this for any content area and anything they read. Have students use a sticky note and note anything that they feel is important, confusing, or anything else that pops into their head as they are reading. Then, they can discuss it at the end with the entire group, small groups, or a partner. This is a fantastic method to take note of what they do and don’t understand. It’s not just for reading workshop!
10.) Retell. Retelling seems more about summarizing and like it’s more of a reading skill, but it’s actually about helping students make sense of what they are reading. By having students retell after they read something, they are processing what happened and getting it to “stick” a bit more.
11.) Word Walls or Personal Dictionaries. Have students keep track of words they struggle with, whether it be spelling or learning to read them. The more they frequent these words, the more “common” and second nature they become.
12.) Choral Reading. A lot can be said for choral reading. When you complete a group read aloud, you are building students’ fluency and self-confidence and motivating them to love reading. I often will choral read in content areas – not just during reading instruction. I have also used echo reading when a chapter in our science textbook contains language that is higher than my students’ levels (which it frequently is!).
No matter what you do, the best place to start is by pre-assessing your students to determine where they are and where you need to start. Scaffolding instruction provides just the right support to help a student grow and be successful. It’s a fine line, I know, but you can do it!
I hope something here is helpful – by no means is it a complete list of scaffolding strategies.


